| /hacks/squishie.html | 5 June 2005 |
Apu 3000Would you like a squishie? |
|
| Backstory: | |
| The
problem with summer, and the subsequent barbecue gatherings it entails
is one of liquid refreshment. Namely, how to get that frozen beverage
into the hands of all attendees without taking an hour or burning up
the household blender. Seeing how summer was fast approaching and we
aren't your ordinary family I felt a 4+ gallon frozen drink machine was
just what the doctor ordered. |
|
| Materials: | |
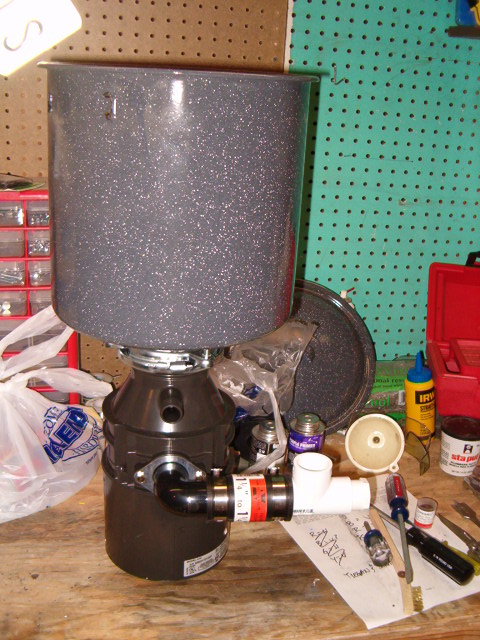
Now for all of the assorted bits that went into constructing this demon-blender:
|
|
The
tricky part comes next. The hardware store didn't have exactly what I
was shooting for so I had to make several concessions and changes to my
initial plan to get the functionality I wanted. That said, I will list
what pieces I used. All pipe dimensions refer to inner diameters unless
otherwise specified.
|
|
| The
pieces I would prefer to change would be to eliminate all of the 1/2"
stuff and just limit the flow at the very end of the spout with the
reducing insert but the hardware store was out of 1" ball valves and I
was on a mission and couldn't wait. I should have. Using that reduction
insert where I did has a tendency to cause an accumulation of crushed
ice which sometimes causes a blockage. I will be rebuilding that
section of pipe before too long. Update: My apologies for not provided a rough cost estimate. I was planning to but seemed to have overlooked it. The grand total came in just under $100 with ~70% being the disposal, ~20% being the pvc elements, and the final ~10% the electrical connections. |
|
| The Build: | |
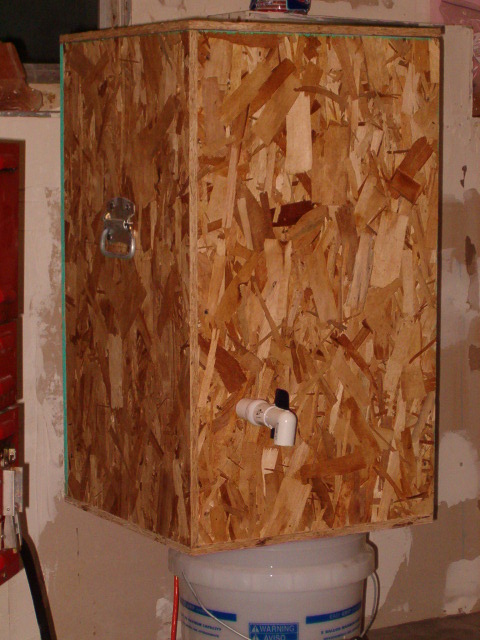 |
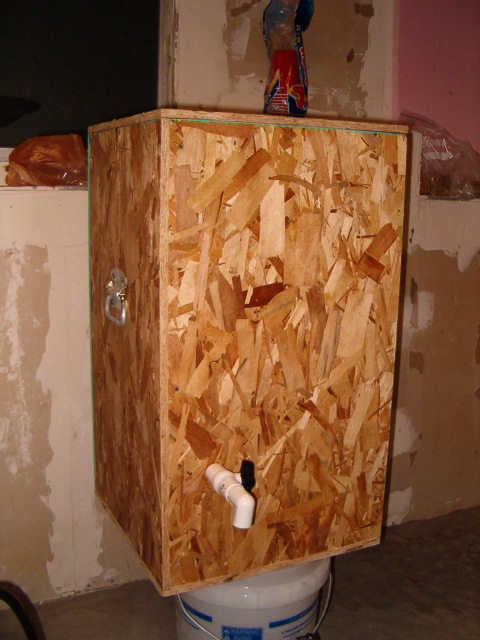
Here's a pic of the finished product. It is kind of an uninspiring enclosure, but I didn't want to blow a couple hours of work on a case that I might have to be tearing apart for troubleshooting purposes. My wife had the great idea of applying instructions and recipes to the case using decoupage so we'll get to that once we fine tune them. |
| Step 1: | |
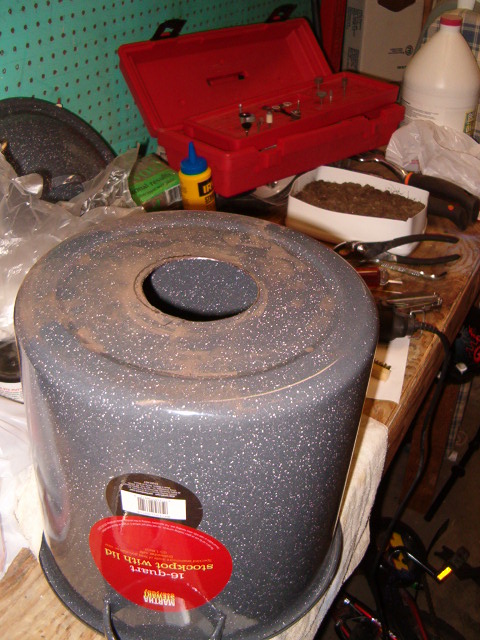 |
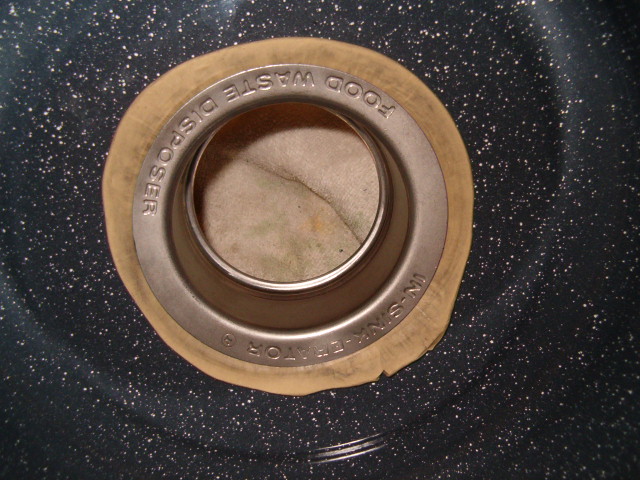
Disassemble the disposal's mounting bits. In particular we'll be dealing with the section that in ordinary circumstances would be the drain in the sink. Center the drain flange on the bottom of the stock pot and mark for cutting. Using a rotary tool and cut-off discs first score the line once around before committing to the full depth cut. I have had better luck maintaining my cuts and preventing "grabbed" and broken discs this way. Your result should look something like the picture at left. |
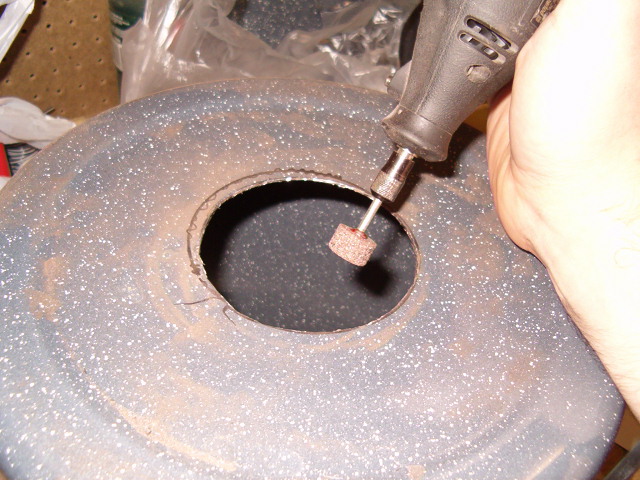
| Take
this time to perform a test fit of the flange into the hole. In the
above picture there is a crescent shaped mark outside the hole. That is
not the area I needed to grind for a good fit. That mark is testament
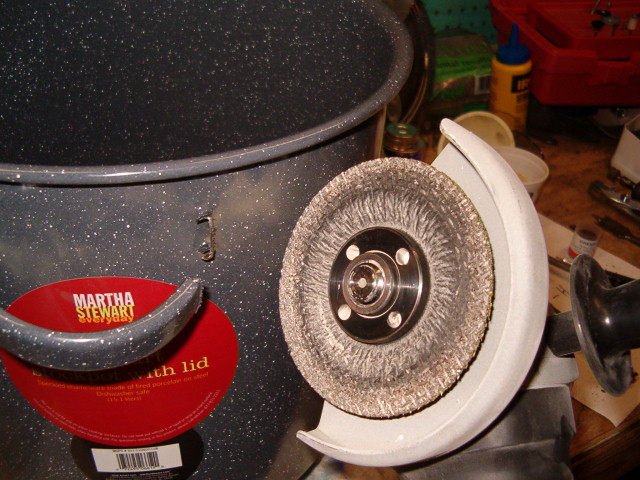
to my inability to find the center of a round object reliably. Moving on... When the fit is snug, but not forced, swap your cutting tool for a grinding wheel. I chose a medium height barrel shaped one. Actually, it was the only one I had left. Grind the cut edge paying attention mostly to the inner surface of the pot. This area is where the disposal to pot seal will take place so be sure to remove any burrs, etc. Here is a shot of the before grinding on mine: |
|
| |
| Step 2: | |
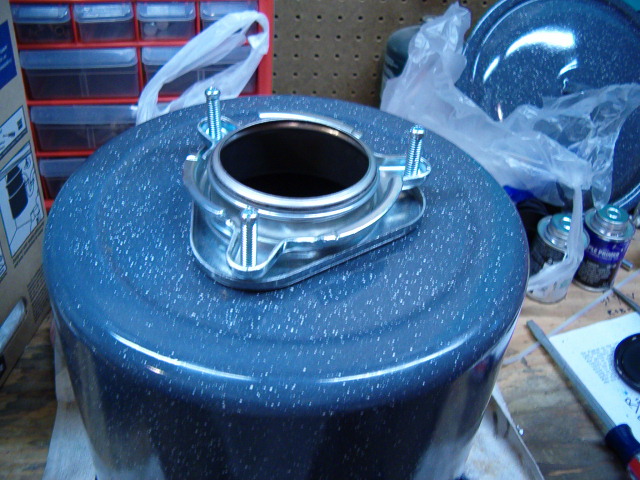
| Assembling the mounting flange. Roll out a length of plumbers putty long enough to wrap around the flange and gently insert the flange through the hole. Press firmly into place and flip the pot bottom side up and install the mount. Once that is complete it should look similar to this: | |
 |
|
 |
Note: This picture shows the plumbers putty after the flange is tightened. It is my experience that this squeeze-out is best left alone until the last possible moment. It will continue to push out excess putty for some time and is much easier to remove as a large piece. |
| Step 3 (optional): | |
| I took this time to streamline the pot by removing the handles. At this point I had no clue whatsoever as to the final size of the case so I thought it best to trim size where I could. If the 6" angle grinder is overkill, too bad. It took about 3 seconds per side to chew through those handles. Be careful not to gouge the pot! | |
 |
Step 4: |
|
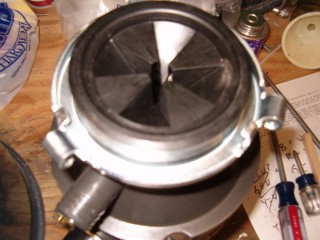
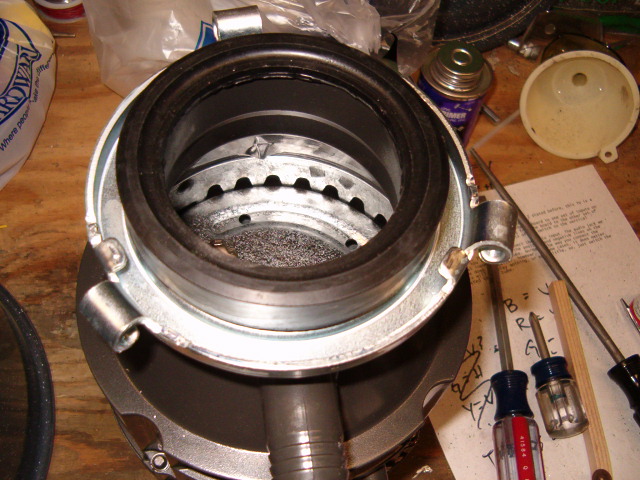
| The upper seal and splashback preventer thingy now need a bit of attention. The rubber portion must be retained to allow a for a watertight seal. However the flow inhibiting effects of the seal are undesired. Out with the trusty razor blade. Here's a before and after look for comparison: | |
 |
 |
Step 5: |
|
| Mate the pot and disposal together. | |
 |
Step 6: |
|
| Also in place in the above picture is the beginnings of the plumbing. Specifically the rubber union and the tee fitting. Measure carefully, perform a test fit and plumb the return line with exception of the 45 degree piece. That piece is intended to to divert the return liquid such that it does not cause excessive splashing in the mixing chamber and assists in the rotational flow created by the spinning disposal. It is important to verify said direction before gluing it on (my first one was backwards, doh!). The assembled return line should look something like this: | |
 |
Step 7: |
|
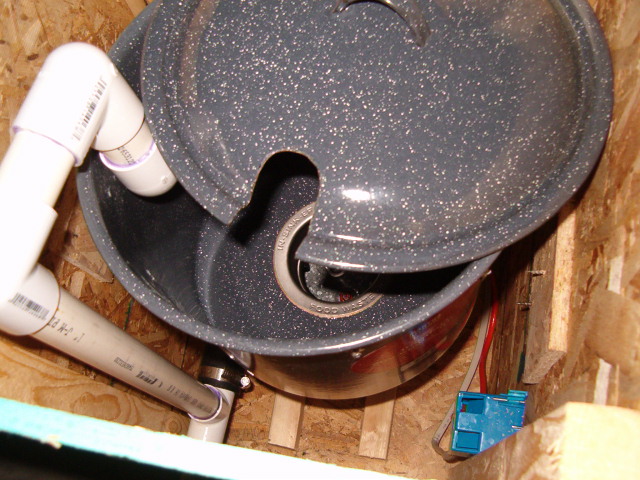
| Visible above, and more clearly below, is the pot lid with a relief cut to allow the return line to pass through it. I marked it by eyeball and cut it with the angle grinder. Not too damn shabby a fit if I do say so myself. | |
 |
Step 8: |
|
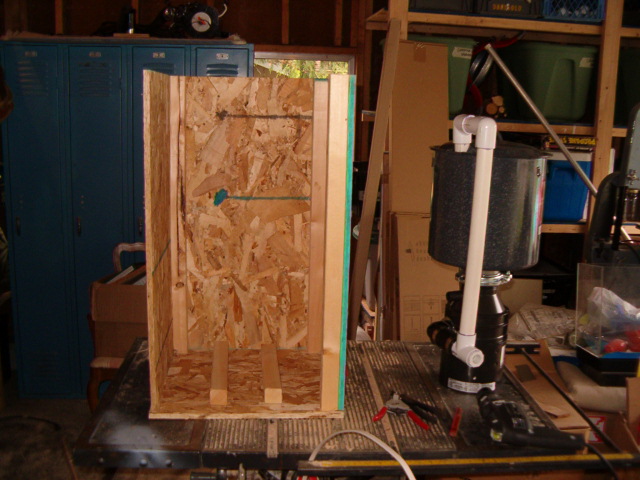
| It's now time for the case. This is where the particulars of your choices in parts and the choice of case materials comes into play. As I said earlier, I went with very simple case materials. I used 2x2 stock for the standoffs in the base because the type of electrical connection the disposal had required it. The disposal is directly wired to a common household light switch with a 16' extension cord leading out of the case. The case also features heavy-duty folding handles to make carrying easier. This is a shot of my unit next to its case: | |
 |
Next Steps: |
|
| Once the case is assembled, install and affix the internals, including the disposal. Mark the face of the case for the hole necessary for the spout. Drill the hole, glue up an overlong pipe leading out of the case and do the final assembly of the case. Fine tune the installation, add insulation etc. By carefully measuring and installing the ball valve outside the case I was able to tightly pinch the fittings together on either side of the case which had the effect of being a second mount point.
The finished product doesn't look like much but I kind of enjoy the ambiguity it holds. Everywhere it goes I get a questioning reaction that turns quickly to a "No shit?" once I have explained its finer points. As of the latest update I have used it 4 times not counting a few wet runs with plain water and ice to clean out any construction crud that was inside. It has performed superbly and, providing the pipe reduction does not take place until after the valve, will continue to do so. |
|
 |
Recipes: |
| Nothing specific yet, but a good general one so far had been 2 two-liter bottles of mixer, a bottle (give or take), of appropriate booze, and a bag o' ice. The one critical thing is to have all the liquid in first and the disposal running before adding the ice. Once it is sufficiently blended just pulse it for a few seconds before dispensing to prevent any overly melted pours. |
Answered Emails: |
| Q:...a guy across the hall from me broke the refrigerant coils on the inside of a minifridge, so i thought of turning it into a clandestine mixing machine. the fridge i can fix, and replace the coils possibly to keep the container colder, for extended usage. im probably going to have to scale down what you did with the posted project. any ideas off the top of your head for a project like this? A:I like the fridge idea but it does pose certain design constraints. Assuming you are intending to use a disposal to mix, the mixing container and bottom fridge wall will both have to be captured in the mount. Off the top of my head the only way to do such is to use a flat bottomed container and and use an appropriately sized spacer (pvc pipe or somesuch) to transition from the mounting flange through the fridge body then sealing to the disposal gasket. I suppose you could also bore the hole in the fridge bottom overlarge and just "hang" the entire assembly from the container. Piping the return line outside the container seems the best choice here as it's easier, and cleaner, to seal from there. Not knowing the internal dimensions of the fridge, container choice seems critical to the whole project's usability. I've found that anything less than ~2 gallons fails to mix so I would start there as your min size. You'd be shooting for a flat bottomed container of at least that volume while maintaining the ability to add mixer and ice easily. Also don't forget about roof for cleaning, some really funky stuff will grow in there if left unchecked. Barring those obstacles, build a small box to hold the disposal, mount the switch, mount the spigot and as camouflage (of course!).
Let me know how it goes, drop a link to the finished project, more questions, whatever. |
| Wrap: | |
| Had a great deal of fun with this one and continue to receive email about it. Being featured on Hackaday almost exploded my hosting but I just squeaked by. If you build one of these monsters, inspired by this or not, I'd enjoy seeing pics/links. Send 'em to the address below. Questions? Send them to webmonkey(a)twofoos.com |
|
 |
|
| Updated: 19 October 2006 - Another great email question Updated: 9 October 2005 - Added more emails, changed layout, minor tweaking to content Updated: 11 June 2005 - Fixed final picture scaling, changed contact email, added email q/a section, added pricing info Updated: 8 June 2005 - Made the images smaller instead of constraining the originals Published: 5 June 2005 |
|